DO YOU PREFER SEAMLESS KNITTING?

Seamless sweaters, from left Jakt, Femgangen and Sport.

There are different reasons to choose seamless knitting. And likewise, there are benefits if you sew.

If you want to make a garment with minimal lumps and bumps around the attachment points, seamless is a good choice. The same goes if you want to avoid steeking.

The need of steeking is one of three main reasons to sew during the assembly of a knitted garment. One is to close small gaps, such as between the sleeves and the body. Another is that the garment is knitted flat, in several parts, which are to be put together. And the third reason is that the fabric must be steeked, to make an opening mid front or somewhere else where it is needed. As mentioned, all three methods will leave tiny lumps along the seam.

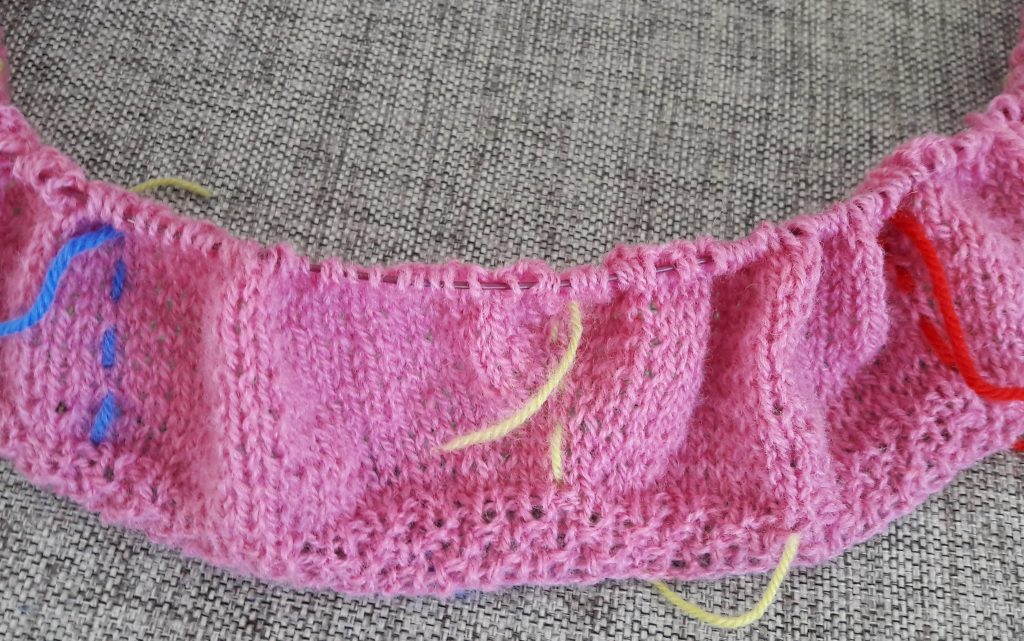
If you prefer seamless knitting, I would like to show you one of my seamless designs. It’s a vest for children, and it’s called Lun. That is the Norwegian word for something warm though not too hot.

The vest is knitted bottom up and flat. The ribbing is made only with knit stitches and purls and looks the same from the wrong side as the right side. Instead of sleeves, one will cast on stitches to make an opening for the arms. Then the shoulders are shaped by doing decreases.

Seamless knitting, the vest Lun.

To see more designs from Aud B, visit the online shop at audb.no. And for more inspiration, stay tuned to this blog and check it out.

KNIT ANOTHER SIZE BY SWITCHING KNITTING NEEDLES

Knitting needles

If you have a pattern in a different size than you want to knit, then you should consider to use another yarn which goes to a different needle size. To make a smaller version you then will have to choose a thinner yarn, and the opposite if you want a larger size of the finished project.

When you have chosen yarn, check out the recommended gauge for it. Then you can use it to find which of the sizes in the pattern that will give the wished circumference. If, for example, the recommended gauge is 22 stitches per 10 cm, and you want the finished garment to have a circumference of 100 cm, then you will have to do a minor calculation. First find how many stitches there is per cm; 22 sts / 10 cm = 2,2 sts. Then multiply it with the circumference; 100 cm * 2,2 sts = 220 sts. Compare your answer with the stated number of stitches the different sizes in the pattern. Now you are able to choose the size that comes closest to desired result.

To knit the design Hjemover in another size

Here is an example where the children’s sweater Hjemover is turned in to a jacket in female size M. To transform the size 8 YO to a fitted size M both yarn and needle were changed. This jacket is made with DK weight yarn and a 4 mm needle instead of fingering weight yarn and a 3 mm needle. Also the length of both the body and the sleeves are adjusted to reach the desired length.

A nice result, or what? And besides this pattern gives a really good opportunity to use up leftover yarn.

sweater Hjemover

To see more designs from Aud B, visit the online shop at audb.no. And for more inspiration, stay tuned to this blog and check it out.

HEADBAND – EASY TO MAKE AND A QUICK KNIT

Easy knitted headband

This is a small and quick knit project which is easy to make. You will be able to complete it in no time, and it gives you a good opportunity to use scrap yarn. Besides, who does not need a new headband now and then? This one is worked in the round and can easily be adjusted to desired measurements.

A quick knit

If you like to make this headband you will need sports weight yarn, approximately 50 grams and 100 metres. And you will also need a 4 mm needle to knit in the round.

Cast on 88 stitches with a 4 mm needle, join and place a marker for the beginning of the round. Work K2 P2 ribbing for 15 cm. Bind off K over K and P over P, and weave in ends. That is all! Your new headband is finished.

To adjust the size of the headband

It is easy to adjust the size. To change the width you will have to add or subtract stitches. The total number of stitches must be divisible with four, which means that you will have to add or subtract 4 stitches at a time. To adjust the length, you will have to knit shorter or longer than stated. Both adjustments will affect how much yarn you will need.

To see more designs from Aud B, visit the online shop at audb.no. And for more inspiration, stay tuned to this blog and check it out.

HOW TO USE YARN WITH DIFFERENT DYE LOTS

Hat knitted with different dye lots

Same yarn colour, but different dye lots?

Why not make it a part of the garment’s look?

On a sweater for example. Figure out if there is enough yarn of same dye lot to knit two sleeves of it. And if not, you might want to place it as a stripe on the yoke or the body. Or maybe you want to make something smaller?

Here is a tip for a hat. This hat is knitted with two different blue colours, only one grey colour, and for the white part it is used three different dye lots.

The darkest colours are in bottom of the hat, and the lightest colours on top. So, the white yarn was sorted by which one was brighter. One can hardly see that they are different, and that was the point this time.

All the colours are knitted to the end of the thread and used up. Because of that the switching of colours will start on different places on the hat and make a softer impression of the shifts. Easy and fun.

White in three different dye lots.

To see more designs from Aud B, visit the online shop at audb.no. And for more inspiration, stay tuned to this blog and check it out.

SIMPLICITY USING THREAD MARKERS

An example of the simplicity by using thread markers.

Most knitters need to use markers when knitting. One of the easiest ways to do it is to use threads. They will give a lot of information while working. Here are some examples of the simplicity by using thread markers.

First, the threads will make you notice whenever there is time to stop for making an increase or a decrease, or something else you would like to be reminded of.

Second, the threads can help you to count rounds. Just put one end of the thread over to the other side of the work every time you reach the right number of rows.

Third, let the threads tell you which part of the work you have reached. One colour for the sides, one colour for midst back, and one for the beginning of the round.

Just find out what works best for you.

This bolero is an example of a knitting project where markers are needed at many points since it has fixed points for increases. For this knitting project you will need nine markers just for the body.

Knitted bolero by Aud B.

To see more designs from Aud B, visit the online shop at audb.no. And for more inspiration, stay tuned to this blog and check it out.

LESS GRANNY, BUT STILL SQUARES

Crocheted squares are often called «granny squares».

Crocheted squares are often called «granny squares». Probably because they often are used in blankets, worked by granny or somebody like her. To make one, you will have to crochet a great number of squares in a lot of different colours and put it all together. It is a very smart solution if you have too much left over of yarn. And most “crafting people” have.

A crocheted vest made of granny squares

It was not really this kind of squares which were the inspiration for the vest Squares. It was some small coasters to put on the coffee table. They were crocheted and very cute! Coasters like that are meant to put cups or glasses on.

Still, to put something like that together in a larger piece, will very soon bring one’s thoughts to granny. That is why it is exciting to make something that is similar, but still is very different, both in expression and shape. In other words, less granny but still squares.

The vest Squares is less granny but still squares. I is crocheted.

To see more designs from Aud B, visit the online shop at audb.no. And for more inspiration, stay tuned to this blog and check it out.

HOW MUCH FUN ISN’T IT TO LEARN A NEW TECHNIQUE

Everyone who loves to go fishing knows that there are different ways to cast the line. That could depend on surroundings, equipment or other things. There is always something new to learn, and techniques to test. How much fun isn’t it to learn a new technique?

Sometimes it is just like a door opens, to a new world, only because of the knowledge of a new technique. And it is all fun to explore how it works, and to find out which new possibilities it contains.

Maybe a new technique will make some tasks easier, but also give new challenges. Maybe it will be the solution needed to come further with an idea. One can guess, but never know exactly, before this new technique has been practiced on the project one hoped it would work for.

Like the jacket Playful. At first it was just meant to be a small crocheted piece, to test how the technique worked. Then the inspiration came, to make something more. It certainly was some questions who needed answers, before it could be a jacket, but it was all worth it. And – a lot of fun.

How much fun isn't it to learn a new technique? The jacket Playful was at first just meant to be a small crocheted piece, to test how the technique worked.

To see more designs from Aud B, visit the online shop at audb.no. And for more inspiration, stay tuned to this blog and check it out.